Showing posts with label Halloween. Show all posts

Wednesday, October 30, 2013

Oreo Pudding Graveyard


Oreo pudding cups were always a favorite of mine when I was growing up. Nothing beats eating “dirt and worms” as a kid! Of course, I had to make it for my daughter's Halloween party for girl scouts. The original recipe that inspired my dessert can be found at http://www.kraftrecipes.com/recipes/dirt-cups-57763.aspx. I didn’t make individual cups because I wanted it to look more like a graveyard to go with the Halloween theme. This is how I made my dirt filled graveyard:

Ingredients
  • Jell-o Chocolate instant pudding and pie-filling (5.9 oz)
  • Milk (3 cups)
  • Cool-Whip, thawed (8 oz. Tub)
  • Oreos (about 15 to 20 Chocolate crème cookies), crushed and divided
  • Marshmallows (large)
  • Gummy worms and gummy skeletons
  • Black tube icing

Directions
1. Place cookies in a Ziploc bag. I used a meat mallet to crush the oreos in the baggie until they were finely crushed into crumbs.
2. Whisk pudding mix and milk together for two minutes. Let stand 5 minutes. Mix about ½ cup of crushed cookies into the Cool-Whip. Then add this cookie/Cool-Whip mixture to the pudding.
3. Pour pudding into a square or rectangular serving dish.
4. Sprinkle the remainder of crushed cookies over the pudding mixture.
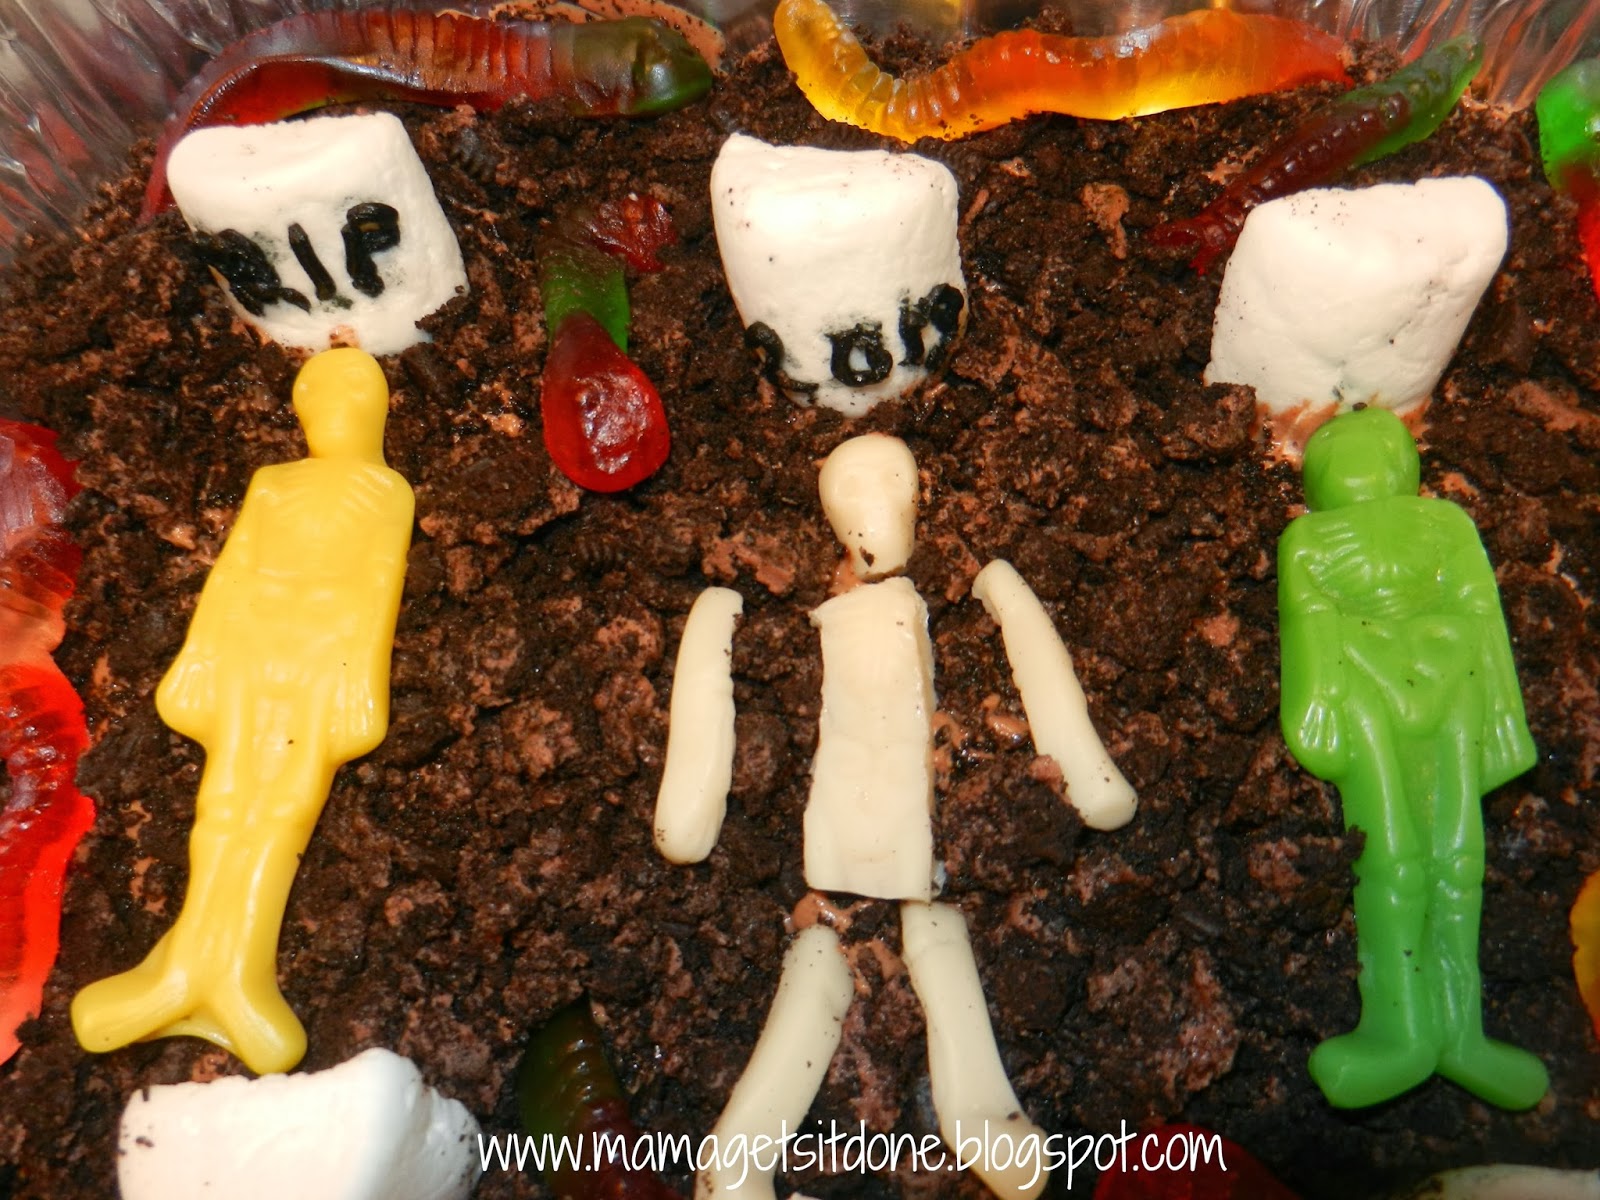
5. Add tombstones, gummy skeletons and gummy worms to your “dirt” to make a graveyard scene.

The tombstones are marshmallows cut in half from top to bottom. I piped “R.I.P” in black icing on a couple of them. I added gummy worms to creep around the graveyard and skeleton gummies. I cut up one of the skeleton gummies so it could appear to have bones peeking out of the dirt.




Thursday, October 24, 2013

Halloween Block Party


I showed you the cute Halloween cupcakes that I made for our neighborhood’s first ever Halloween block party. Our neighborhood is brand new so this is a lot of people’s first year celebrating Halloween in the area. The awesome thing about our neighborhood is everyone is super friendly and there are tons of kids around here!
Our first step in planning the party was to make invitations. I made a quick invite on picmonkey.com. Then two weeks prior to the party a neighbor and I went door-to-door and hand delivered the invites. We also had a sign up sheet for food and party supplies for anyone that wanted to participate.

(We also included our contact information, location, and a reminder to wear their costumes!)

The Halloween block party was so much fun! The cupcakes that I made were used for our “Cupcake Walk.” (If you missed the Halloween decorated cupcakes you can see them here.) I taped pumpkin die-cuts onto our neighbor’s driveway. Then, I set up the numbered pumpkins in a circle and the kids walked around while music played in the background. When the music stopped I chose a number from a bucket and that child won a cupcake.


One of my neighbors set up a table for face painting and I set up to apply Halloween tattoos on the kids’ hands. I had purchased a bag of Skull Tattoo boxes at Wal-Mart. These individual boxes are meant for trick-or-treating and goody bag treats, but they were just right for this occasion!


Later, a neighbor set up chairs and some of the kids played musical chairs. It was so funny to watch how competitive they became when they ran to grab a seat. Another neighbor purchased glow sticks, and the kids had fun waving them around and dancing with them when it got darker. This was such a great idea and it kept the kids entertained!


I was so busy with all the kid’s activities and games that I failed to take more pictures. Most of them were taken with my cell phone because we were running around so much. We had a beautiful spread of yummy food and desserts, but no pictures to show for it. Oh, well! We had hotdogs, frito pies, veggie trays, fruit trays, and so much more! It was great having all those planned activities, but I think everyone had a great time just hanging out, playing, and getting to know all the neighbors!


Our neighborhood had our first Halloween block party and it was a total success! I think everyone agreed that we would be making this an annual neighborhood event!

Wednesday, October 23, 2013

Halloween Cupcakes


This past weekend I made some delicious and fun Halloween cupcakes for our neighborhood block party. (More to come on that later!) We used them for our cupcake walk so I wanted to create a variety of cupcakes that the children could pick from for their prize. I think they were a success because all the kids took their time to choose their favorite decorated cupcake.

My main decorating ingredients were mini M&M's and tubed black gel icing. I think I used those two items on almost every cupcake. I used a tub of cream cheese flavored icing, but I added food coloring to make green and orange icing for some of the cupcakes.


Mummies- I made mummies by piping "wraps" with my white tubed icing. In the middle of the wrapping I added yellow M&M's and piped black gel in the center of the M&M's for eyes.

Jack-o-Lanterns- I made Jack-O-Lanterns with M&M eyes and a leaf. Then I piped a jack-o-lantern face with the black gel icing.

Frankenstein- To make the Frankenstein cupcakes I made squiggly hair and a mouth with the black gel.

Spiders- The Spider cupcakes were made with an oreo, M&M's, and black gel icing for the legs.

Monster- A favorite cupcake was the monster with many eyes. I used red or green M&M eyes with black gel in the middle.

Witch- I also made a Witch's hat cupcake to match my daughter's costume. It had an Oreo cookie with a Hershey kiss on top and black icing around the Hershey kiss.

Ghosts- To make simple ghosts I left the cupcakes white and added eyes.

You can be so creative when making Halloween cupcakes, and I can't wait to create more!


Friday, October 11, 2013

Halloween Lunch Ideas


I love making cute lunches for the month of October! There are so many ways to dress up your kid’s lunches during this time! Think of the various themes like Halloween, ghosts, pumpkins, Fall, monsters, jack-o-lanterns, mummies, bats, owls, etc.

Jack-o-Lanterns


Saw this on pintrest! I used a mandarin orange fruit cup and added a face with a sharpie to make a jack-o-lantern. So Easy!


Mummies

Wrap a hotdog wienie or sausage in a crescent roll and bake according to package. Add some eyes with food bits, mustard, candy, or icing and you have yourself a mummy!


Wrap your drink or treat in gauze and add googly eyes to dress it up as a mummy. Layer strips of sliced mozarella cheese on a sandwich to make a mummy face.

Ghosts

Shape your crescent roll dough into a ghost and add eyes.


Bats

I found a bat sandwich cutter a couple of years ago and...Ta-da!


Stickers & Picks

Add Halloween stickers to notes, baggies, and fruit. Put a toothpick in between two stickers that are back to back and you have your own pick to hold cheese, fruit, cubed ham, etc.

Use Halloween themed picks or cupcake toppers like the one below to make fruit kabobs or to make fruit and cheese sticks.


Halloween Treats

I try not to put candy or load their lunches with sugary sweets, but I do like to treat the kids every now and then to something special. I made these sugar cookies using my Pampered Chef set of mini cookie cutters. The leaf and pumpkin cutters are great for these cookies, but I also use them to cut sliced cheese into fun shapes.


It's so much fun to make Halloween bento lunches. So get out your cute cookie cutters, Halloween stickers, and use a little imagination to make lunch a little sweeter! Your kids will thank you!!

Friday, September 27, 2013

Pumpkin Marshmallow Pops


Last month, we had a Lego party for my 6-year old son. I made cute yellow Lego-Head marshmallow pops. They were a hit with the kids and they loved the many faces I drew on them.  I started thinking about Fall and Halloween coming up. So...I decided to make pumpkin and jack-o-lantern marshmallow pops!
Want to make some of your own marshmallow pops?

      Materials
  • Wilton Candy Melts (orange)
  • Bowl for melting candy
  • Large Marshmallows
  • Cookie sticks or cake pop sticks
  • Egg carton or Styrofoam (for drying)
  • Black decorating gel and/or green icing tubes, green sprinkles (optional)
  • Chocolate morsels


They are so easy and fun to make. First, you will need some candy melts. I used orange, but you can use white and add food coloring to it if you want a certain color.

Place marshmallows on top of cookie sticks.


Put candy melts in a microwaveable bowl. Melt the candies according to package. Mix the melted candy.


Dip marshmallows in melted candy coating. Use your spoon to smooth the coating for a finished look. Add a chocolate morsel to the top for a stem.


Stick pops in Styrofoam or egg carton to dry. (I poked holes at the top of the egg carton so the sticks would stand up straight and not touch the other pops.)

When the marshmallow pops are dry you can add candy embellishments or icing. Pipe a jack-o-lantern face with black decorating gel if you wish. I also added green sprinkles to the top for leaves. 


Enjoy these yummy and cute treats anytime!


Make pumpkin marshmallow pops